DIY Floating Shelves: Stylish Storage You Can Build in an Afternoon
Transform your space with custom floating shelves that combine function and style
Why Floating Shelves Are Perfect for Modern Homes
Floating shelves have become increasingly popular in contemporary interior design because they create clean lines and maximize space without the visual bulk of traditional brackets. These wall-mounted storage solutions work exceptionally well in small apartments, modern homes, and minimalist spaces where every square inch matters.
Unlike traditional shelving systems, floating shelves appear to “float” against the wall with no visible support hardware. This creates an illusion of more space while providing functional storage for books, decorative items, plants, and everyday essentials. The versatility of floating shelves makes them suitable for bathrooms, kitchens, living rooms, bedrooms, and home offices.
Benefits of Building Your Own Floating Shelves
- Complete control over dimensions and wood species
- Significant cost savings compared to retail options
- Custom finish options to match existing decor
- Satisfaction of creating functional furniture with your own hands
- Ability to create perfectly sized shelves for specific spaces
- Higher quality construction than many mass-produced alternatives
Essential Tools and Materials
Success in any DIY project starts with having the right tools and materials. Fortunately, floating shelves require relatively basic woodworking tools that most homeowners either own or can easily acquire.
| Tool/Material | Purpose | Estimated Cost |
|---|---|---|
| Circular Saw or Miter Saw | Cutting wood to length | $80-200 (or rent for $40/day) |
| Drill with Bits | Creating pilot holes and driving screws | $50-120 |
| Router (Optional) | Creating rounded edges and dados | $100-300 |
| Level | Ensuring straight installation | $15-35 |
| Stud Finder | Locating wall studs for secure mounting | $20-50 |
| Sandpaper (120, 220 grit) | Smoothing wood surfaces | $10-20 |
| Wood Stain or Paint | Finishing the shelves | $15-30 |
| Wood Screws (2.5″ and 3″) | Assembling components | $8-15 |
Choosing the Right Wood
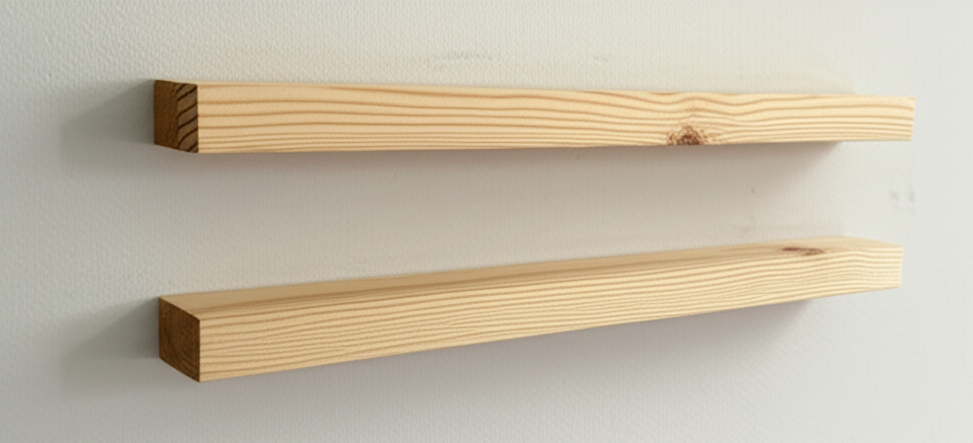
The type of wood selected significantly impacts both the appearance and durability of floating shelves. Popular choices include pine for budget-conscious projects, oak for traditional looks, maple for contemporary styles, and walnut for premium applications.
Pine remains the most economical option and works well for painted finishes, though it can dent easily. Oak provides excellent durability and distinctive grain patterns that look beautiful with natural stain finishes. Maple offers a clean, contemporary appearance with minimal grain, making it perfect for modern interiors. Walnut delivers rich, dark tones that create stunning focal points but comes with a higher price tag.
Project Cost Breakdown
Planning Your Floating Shelf Design
Proper planning prevents poor performance, especially when creating custom storage solutions. Before cutting any wood, homeowners should carefully measure the installation space and consider how the shelves will be used.
Standard Floating Shelf Dimensions
The intended use greatly influences design decisions. Bookshelves require greater depth and stronger support systems than decorative display shelves. Kitchen shelves must accommodate specific dish sizes and support considerable weight. Bathroom shelves need water-resistant finishes and appropriate sizing for toiletries.
Weight Capacity Considerations
Understanding weight limits ensures safe and functional installations. A properly constructed floating shelf anchored into wall studs can typically support 30-50 pounds, depending on length and construction quality. Shelves longer than 36 inches should include additional support points or thicker construction to prevent sagging.
Safety First
Always wear safety glasses when cutting or sanding wood. Use hearing protection with power tools. Ensure adequate ventilation when applying stains or finishes. Double-check stud locations before drilling mounting holes.
Step-by-Step Construction Process
Measure and Cut Your Wood
Start by cutting the main shelf board to your desired length. For a standard 36-inch shelf using 1×8 lumber, you’ll also need to cut a cleat from 2×3 lumber at 34 inches long. The cleat system provides the hidden support mechanism that creates the floating effect.
Make all cuts square and clean. Measure twice and cut once to avoid waste and ensure proper fit during assembly.
Create the Hidden Cleat System
The cleat system consists of two matching pieces: one attached to the wall and another routed into the back of the shelf. Using a router or table saw, cut a 45-degree bevel along the length of your 2×3 cleat, creating two interlocking pieces.
This French cleat system distributes weight evenly and provides a secure mounting method that remains completely hidden once installed.
Route the Shelf Back
Mark the center line on the back of your shelf board. Using a router with a straight bit, carefully route a channel that matches your wall cleat dimensions. The channel should be deep enough to fully accept the wall cleat while maintaining structural integrity.
Test fit frequently during this process to ensure a snug but not overly tight connection.
Sand All Surfaces
Begin with 120-grit sandpaper to remove any rough spots or tool marks. Progress to 220-grit for a smooth, finish-ready surface. Pay special attention to cut edges and the routed channel to ensure clean lines.
Proper sanding makes the difference between amateur and professional-looking results.
Apply Your Chosen Finish
Whether using stain, paint, or clear protective coating, apply thin, even coats following manufacturer directions. Sand lightly between coats with 320-grit paper for ultra-smooth results.
Allow proper drying time between coats and before installation to ensure durability.
Install the Wall Cleat
Locate wall studs using a stud finder. Mark stud locations and use a level to ensure the wall cleat will be perfectly horizontal. Secure the cleat with 3-inch screws driven into at least two studs for adequate support.
This step determines the success of your entire project, so take time to get it right.
Mount Your Floating Shelf
Carefully align the shelf channel with the wall cleat and slide into position. The shelf should sit flush against the wall with no gaps or wobbling. If properly executed, the mounting system remains completely invisible.
Test the installation by gently applying downward pressure to ensure secure attachment.
Pro Tips for Success
Grain Direction: Always install shelves with the wood grain running horizontally for maximum strength and visual appeal.
Multiple Shelves: When installing several shelves, use a story stick to ensure consistent spacing and perfect alignment.
Heavy Items: Place heavier objects closer to wall studs for optimal weight distribution.
Advanced Techniques and Customization Options
Once comfortable with basic floating shelf construction, several advanced techniques can elevate your projects. Adding LED strip lighting underneath shelves creates dramatic accent lighting while improving functionality. Incorporating cable management systems keeps electronics organized and cords hidden.
Lighting Integration
LED strip lights can transform floating shelves from simple storage into striking design elements. Route shallow channels along the front underside of shelves to hide LED strips while providing even illumination. This technique works particularly well for display shelves showcasing collectibles or artwork.
Consider using battery-powered LED strips for easy installation without electrical work, or hardwire strips for permanent installations. Warm white LEDs create cozy ambiance, while cool white provides crisp task lighting.
Creating Shelf Systems
Multiple floating shelves can create impressive wall systems when properly planned. Stagger shelf lengths and heights to create visual interest while maximizing storage. Maintain consistent spacing between shelves for professional appearance.
Corner installations require special consideration for cleat placement and support. L-shaped floating shelves can maximize corner space but need additional engineering to handle the unique stress patterns.
Common Mistakes and How to Avoid Them
Several common errors can compromise floating shelf projects. Poor stud location leads to inadequate support and potential failure. Always verify stud locations with multiple methods and consider using toggle bolts for additional security in drywall-only areas.
Measurement Errors
Inaccurate measurements rank among the most frustrating and expensive mistakes in DIY projects. Create detailed drawings with all dimensions clearly marked. Use a reliable measuring tape and double-check all measurements before cutting.
Account for wall irregularities that might affect shelf installation. Older homes often have walls that aren’t perfectly plumb, requiring slight adjustments during installation.
Finish Problems
Rushing the finishing process often results in disappointing final appearance. Inadequate sanding shows through stain finishes, while inadequate preparation causes paint adhesion problems. Allow proper drying time between coats to prevent finish defects.
Test stains and finishes on scrap wood pieces to preview final appearance before applying to completed shelves. Wood species react differently to stains, and what looks good on pine might appear completely different on oak.
Maintenance and Longevity
Properly constructed and installed floating shelves require minimal maintenance but benefit from periodic inspection. Check mounting hardware annually to ensure screws remain tight. Look for signs of sagging that might indicate overloading or hardware failure.
Dust shelves regularly with microfiber cloths to prevent buildup that can dull finishes. Avoid harsh chemicals that might damage wood finishes. Reapply protective coatings every few years in high-use areas to maintain appearance and durability.
Troubleshooting Common Issues
Shelf sagging usually indicates inadequate support or overloading. Adding additional wall cleats or reducing load typically resolves the problem. Gaps between shelf and wall often result from walls that aren’t perfectly flat and can be addressed with shims or caulk.
Loose mounting can develop over time, particularly in homes that experience settling or temperature fluctuations. Retighten mounting screws as needed, but investigate underlying causes if loosening occurs frequently.
Cost Comparison with Store-Bought Options
DIY floating shelves offer significant savings compared to retail alternatives. Quality hardwood shelves from furniture stores often cost $80-200 per shelf, while DIY versions using similar materials cost $30-60 each.
The time investment varies by skill level and project complexity, but most homeowners complete simple floating shelves in 4-6 hours including finishing time. This compares favorably to the time required for shopping, delivery scheduling, and professional installation of purchased shelves.
Custom sizing represents another major advantage of DIY construction. Retail shelves come in standard sizes that might not fit specific spaces perfectly, while DIY versions can be tailored to exact requirements.
Safety Considerations and Best Practices
Workshop safety should never be compromised for project speed or convenience. Power tools demand respect and proper technique to prevent injury. Always disconnect tools when changing bits or blades, and maintain sharp cutting tools for safer, cleaner cuts.
Important Safety Reminders
- Never bypass safety guards on power tools
- Keep work areas clean and well-lit
- Store tools properly when not in use
- Have a first aid kit readily available
- Know the location of electrical shutoffs
Installation safety requires equal attention to workshop safety. Use proper ladder techniques when installing wall cleats, and have someone assist with shelf mounting when possible. Test all installations thoroughly before loading with items.
Environmental Considerations
Choosing sustainably harvested lumber supports responsible forestry practices. Look for Forest Stewardship Council (FSC) certified wood products when available. Reclaimed wood offers another environmentally friendly option while providing unique character and history.
Proper disposal of wood scraps and finishing materials protects local environments. Many communities offer recycling programs for construction materials, and wood scraps make excellent kindling for fireplaces or fire pits.
Low-VOC (Volatile Organic Compound) finishes improve indoor air quality while providing excellent protection for wooden surfaces. Water-based finishes typically contain fewer harmful chemicals than solvent-based alternatives.
Expanding Your Skills
Floating shelves serve as excellent introductory projects for developing woodworking skills. Success with these projects builds confidence for tackling more complex furniture pieces like built-in bookcases, kitchen islands, or custom cabinets.
Consider joining local woodworking clubs or online DIY communities to share experiences and learn new techniques. Many communities offer woodworking classes that provide access to professional-grade tools and expert instruction.
Document your projects with photos and notes to track progress and identify areas for improvement. This documentation proves invaluable when planning future projects or troubleshooting problems.
Transform Your Space Today
DIY floating shelves represent the perfect intersection of practicality and style. These versatile storage solutions can transform any room while providing the satisfaction that comes from creating functional furniture with your own hands. The techniques learned during floating shelf construction translate to countless other woodworking projects, making this an ideal starting point for developing valuable DIY skills.
Whether you need bathroom storage, kitchen organization, or living room display space, custom floating shelves deliver exactly what your space requires. The afternoon spent building these practical storage solutions will provide years of functional service and visual appeal.
Start planning your floating shelf project today, and discover the satisfaction of creating beautiful, functional storage that perfectly matches your home’s unique style and requirements.